
Notice
Recent Posts
Recent Comments
Link
반응형
| 일 | 월 | 화 | 수 | 목 | 금 | 토 |
|---|---|---|---|---|---|---|
| 1 | 2 | 3 | ||||
| 4 | 5 | 6 | 7 | 8 | 9 | 10 |
| 11 | 12 | 13 | 14 | 15 | 16 | 17 |
| 18 | 19 | 20 | 21 | 22 | 23 | 24 |
| 25 | 26 | 27 | 28 | 29 | 30 | 31 |
Tags
- 강화학습
- 파이썬 알고리즘
- 비지도학습
- 코딩테스트
- 캐싱
- 백준
- 지도학습
- 자바
- 스택과 힙
- bineary search
- rest api
- 파이썬 오류
- post
- 이진탐색
- 프로그래머스
- 해시
- HTTP
- 오버라이딩
- 파이썬
- BOJ
- 코딩
- 머신러닝
- 멱등
- 알고리즘
- 코테
- 너비우선탐색
- 깊이우선탐색
- 딥러닝
- 딕셔너리
- Merge sort
Archives
- Today
- Total
chae._.chae
시큐리티 - (1) 시큐리티 초기 설정 본문
728x90
반응형
Dependencies :
- Spring Boot DevTools
- Lombok
- Spring Data JPA
- MySQL Driver
- Spring Security
- Mustache
- Spring Web
위의 의존성을 추가해 프로젝트를 생성해준다.
- application.yml 파일 설정
server:
  port: 8080
  servlet:
    context-path: /
    encoding:
      charset: UTF-8
      enabled: true
      force: true
spring:
  datasource:
    driver-class-name: org.mariadb.jdbc.Driver
    url: jdbc:mariadb://localhost:3307/security?serverTimezone=Asia/Seoul
    username: root
    password: 1234

  main:
    allow-circular-references: true

  jpa:
    hibernate:
      ddl-auto: update
      naming:
        physical-strategy: org.hibernate.boot.model.naming.PhysicalNamingStrategyStandardImpl
    show-sql: true
- IndexController.java
@Controller  // view를 return
public class IndexController {

    // localhost:8080/
    // localhost:8080
    @GetMapping({"", "/"})
    public String index(){
        // 머스테치 기본 폴더 : src/main/resources/
        // 뷰 리졸버 설정(application.yml에서 설정) : templates(prefix), .mustache(suffix) -> 생략가능
        return "index";  // src/main/resources/templates/index.mustache를 찾는다
    }

    // 권한설정을 해줘서 권한이 있는 사람만 접속할 수 있게끔
    @GetMapping("/user")
    public @ResponseBody String user(){
        return "user";
    }

    @GetMapping("/admin")
    public @ResponseBody String admin(){
        return "admin";
    }

    @GetMapping("/manager")
    public @ResponseBody String manager(){
        return "manager";
    }
	// 시큐리티가 해당 주소를 낚아채서, 내가 설정한 login이 뜨지 않고, username과 password를 입력하는 창이 뜬다.
    // SecurityConfig 파일 생성후 권한 설정을 해둔 뒤, 시큐리티가 낚아채지 않는다.
    @GetMapping("/login")
    public @ResponseBody String login(){
        return "login";
    }

    @GetMapping("/join")
    public @ResponseBody String join(){
        return "join";
    }

    @GetMapping("/joinProc")
    public @ResponseBody String joinProc(){
        return "회원가입 완료됨!";
    }

}
해당 주소로 접속했을때 뜨는 페이지 문구를 간단하게 만들어준다.
http://localhost:8080에 접속하면 바로 index.html이 보이지 않고 위의 로그인 페이지가 뜬다.
스프링부트에 시큐리티 의존성을 사용하면 홈페이지로 들어가는 모든 주소가 막혀서 인증이 필요한 서버가 된다.

Username : user
Password : 스프링부트를 실행시켰을 때 위의 사진처럼 출력되는 security password를 입력

- config패키지를 생성하고, SecurityConfig.java 파일을 설정해준다.
@Configuration
@EnableWebSecurity
public class SecurityConfig extends WebSecurityConfigurerAdapter {

    @Override
    protected void configure(HttpSecurity http) throws Exception {

        http.csrf().disable();
        http.authorizeRequests()
                .antMatchers("/user/**").authenticated()  // 해당 주소로 들어오면 인증이 필요하다
                .antMatchers("/manager/**").access("hasRole('ROLE_ADMIN') or hasRole('ROLE_MANAGER')")  // admin과 manager권한이 있는 사람만 접속 가능
                .antMatchers("/admin/**").access("hasRole('ROLE_ADMIN')")
                .anyRequest().permitAll(); // 다른 주소는 모두 허용

    }

}
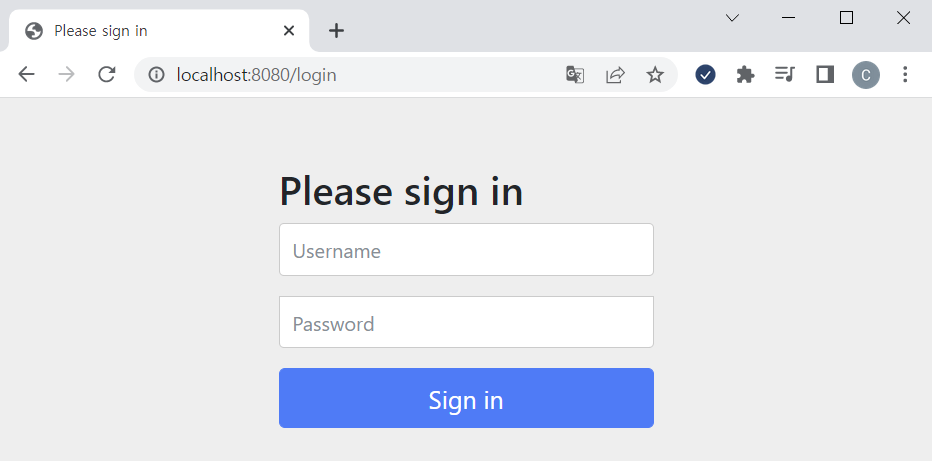
이제 http://localhost:8080 페이지로 접속하면 로그인하지 않아도 index페이지가 뜨게 된다.
위에서 antMatchers()로 설정해준 주소가 아니기에 접근 가능하다.
또한, /login페이지로 접속하면 스프링 시큐리티가 낚아채지 않고 내가 만든 login페이지로 이동한다.
/user로 접속하면 접근권한이 없다는 403에러가 뜬다. (로그인을 아직 안했기 때문에)
이제 권한이 없는 페이지에 접속했을때 로그인 페이지가 나오도록 설정해주려면, SecurityConfig에서
@Override
protected void configure(HttpSecurity http) throws Exception {

    http.csrf().disable();
    http.authorizeRequests()
            .antMatchers("/user/**").authenticated()  // 해당 주소로 들어오면 인증이 필요하다
            .antMatchers("/manager/**").access("hasRole('ROLE_ADMIN') or hasRole('ROLE_MANAGER')")  // admin과 manager권한이 있는 사람만 접속 가능
            .antMatchers("/admin/**").access("hasRole('ROLE_ADMIN')")
            .anyRequest().permitAll() // 다른 주소는 모두 허용
            .and()
            .formLogin()
            .loginPage("/login"); // 권한이 없는 페이지에 접속했을때 로그인 페이지가 나오도록 설정
}
loginPage() 설정을 추가해준다.

728x90
'스프링 > 시큐리티' 카테고리의 다른 글
| JWT 토큰 서버 구축하기 - (2) (0) | 2022.07.28 |
|---|---|
| JWT 토큰 서버 구축하기 - (1) (0) | 2022.07.28 |
| 시큐리티 - (3) 권한 및 구글 로그인 설정 (0) | 2022.07.02 |
| 시큐리티 - (2) 회원가입과 로그인 (0) | 2022.07.02 |
| 스프링 시큐리티 로그인 - SecurityConfig (0) | 2022.05.11 |